
Introduction
Minecraft Java Edition is an extremely popular video game in which players create and break apart various kinds of blocks in three-dimensional worlds. The game was originally released in 2009. The game’s two main modes are Survival, Creative, Adventure, Hardcore, and Spectator. In Survival, players must find their own building supplies and food. In addition, they also interact with blocklike mobs, or moving creatures.
As of late 2019, it was the second best-selling video game of all time. This tutorial shows how to create your own Minecraft server so that you and your friends can play together.
We will be setting up a server in Ubuntu Linux that will work with the Java version of Minecraft. Any other versions of the game will not work with this server – as Bedrock, PS4, Xbox etc.
The beauty of having your own Minecraft server is totally up to you. Being the OP of the game means you can choose what settings are used on the server, you can use your OP privileges for an advantage, or help your friends that you play with. You may want to create a private server for just you or your friends or make it public for everyone to access and make it a huge party.
Ubuntu 20.04 Focal Fossa is a good and easy choice for hosting a Minecraft server. For instance, as it’s known for the stability when running servers, and Ubuntu is known for its ease of use and extensive information on the web. Follow along below as we take you through the steps to get your Minecraft server up and running.
In this tutorial you will learn:
- How to install and configure Minecraft Server
- Create Minecraft SystemD startup script
- Make new Minecraft server instance on the same host
- Make a daily copy of the Minecraft server for backup purposes
Prerequisites
To follow this tutorial, you’ll need:
- A computer that will act as a server with a fresh installation of Ubuntu 20, a non-root user with sudo privileges, and SSH enabled.
- A copy of Minecraft Java Edition installed on a local Mac, Windows, or Linux machine (if you want to play Minecraft as well)
- Access to your modem/router for port forwarding
- Wget, net-tools
You can follow this step by step tutorial to start up your server. Minecraft can be resource-intensive depending on the number of people playing, so you should mind that when setting up the server.
Step 1 — Installing the Necessary Software Packages, Configure the Firewall and make a new user
With your server initialized, your first step is to connect to the terminal with SSH access with your regular account.
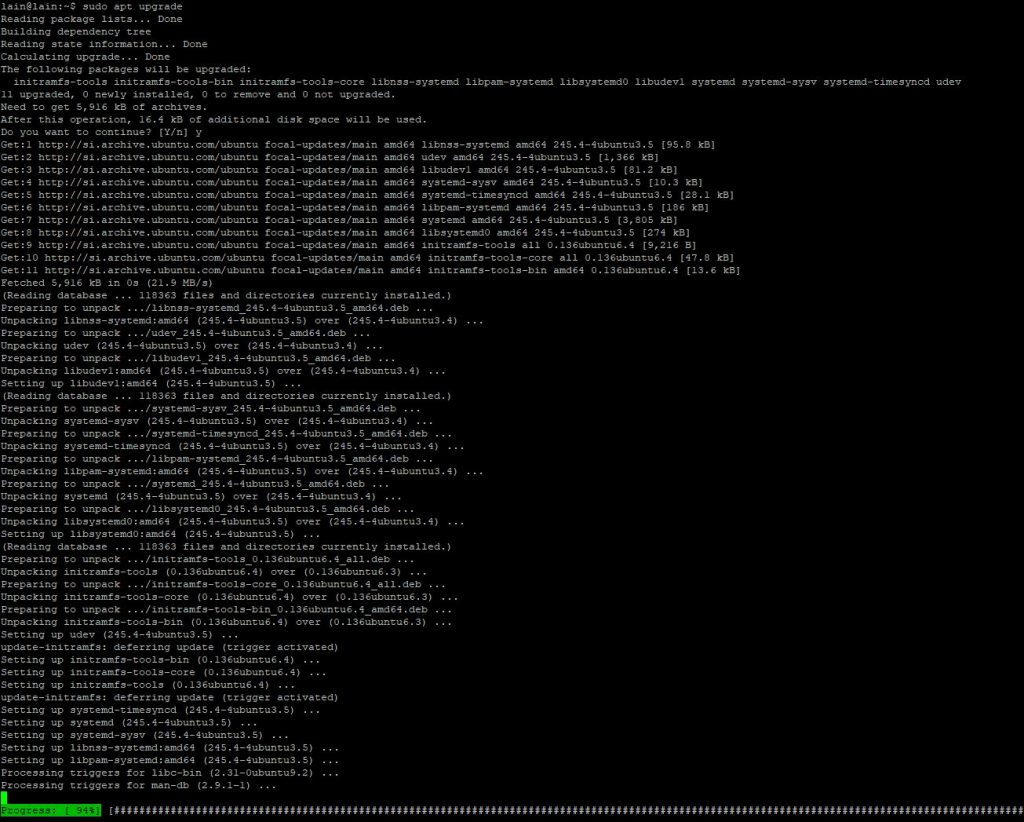
We will be installing Java which will run the Minecraft server. As with all Ubuntu installations, you need to first update the package index for the APT package manager:
sudo apt update
sudo apt upgrade
Next, install the OpenJDK version 8 of Java, specifically the headless JRE. This is a minimal version of Java that removes the support for GUI applications. This makes it ideal for running Java applications on a server. Run the bellow command and confirm the action.
sudo apt install openjdk-8-jre-headless
Now that you have the packages installed, we need to enable the firewall to allow traffic to come in to our Minecraft server. In the initial server setup that you performed you only allowed traffic from SSH. Now you need to allow for traffic to come in via port 25565, which is the default port that Minecraft uses to allow connections. Add the necessary firewall rule by running the following command:
sudo ufw allow 25565

You can check if it worked by typing in the terminal:
sudo ufw status

It’s best practice to let the Minecraft server run under its own dedicated account, rather than using root or some other account. Create a new account in Ubuntu with the following command:
sudo useradd -m -r -d /opt/minecraft minecraft
It’s possible to run multiple instances of the Minecraft server on a single host. We’ll show you how to do this later in the tutorial in case you’re wanting to run multiple servers. Each server instance we run will need its own directory under the /opt/minecraft directory. For this first server instance, let’s call it survival and create the following directory:
sudo mkdir /opt/minecraft/survival
Step 2 — Downloading the Latest Version of Minecraft
Java is installed and your firewall properly configured, you need to download the Minecraft server from the Minecraft website.
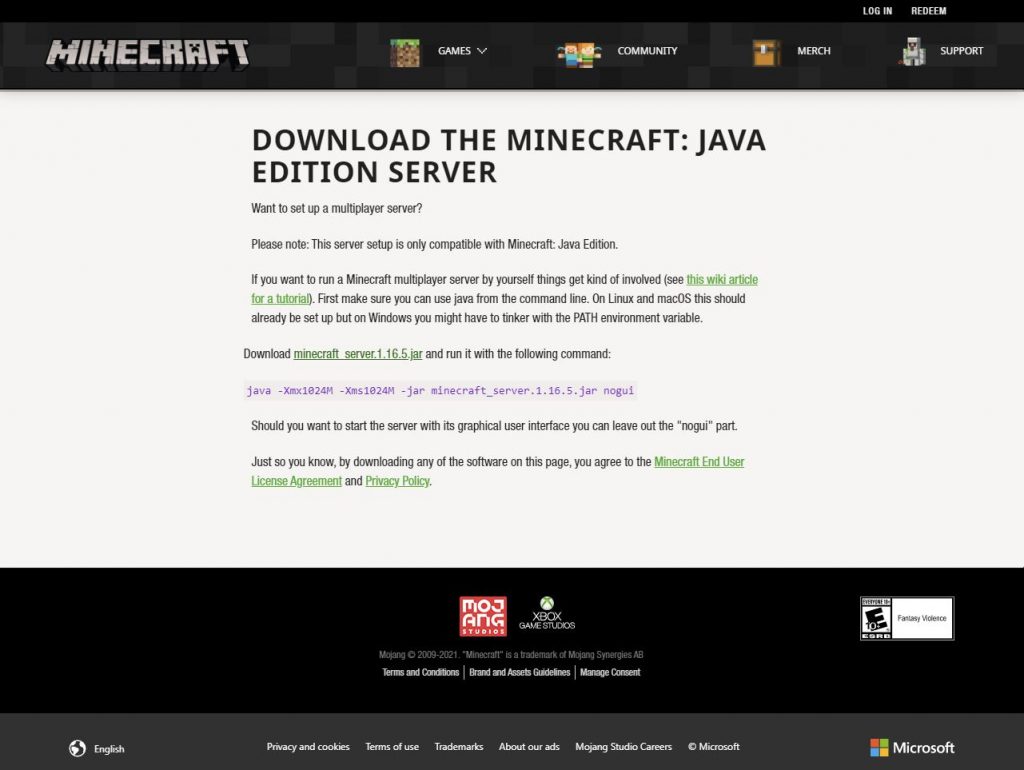
This is the address of the server: https://www.minecraft.net/en-us/download/server/
Minecraft Java version 1.16.5 has the address https://launcher.mojang.com/v1/objects/1b557e7b033b583cd9f66746b7a9ab1ec1673ced/server.jar
We suggest to check the latest version and get a fresh link. You can now use wget and the copied link to download the server:
sudo wget https://launcher.mojang.com/v1/objects/1b557e7b033b583cd9f66746b7a9ab1ec1673ced/server.jar

If you intend to upgrade your Minecraft server, or if you want to run different versions of Minecraft, rename the downloaded server.jar to minecraft_server_1.16.5.jar, matching the highlighted version numbers to whatever version you just downloaded:
sudo mv server.jar minecraft_server_1.16.5.jar
You can also download and run old versions, but that is out of the scope of the current tutorial.
Let`s start with the configuration of the server.
You need to accept the terms and conditions before being able to install the Minecraft server. Use this command:
sudo bash -c "echo eula=true > /opt/minecraft/survival/eula.txt"
Lastly, we need to give our minecraft user account ownership on the Minecraft server directory:
sudo chown -R minecraft:minecraft /opt/minecraft/survival/
You can also use lower folders to be able to make backups etc.
udo chown -R minecraft:minecraft /opt/minecraft/

Step 3 – Create Minecraft SystemD startup script
Adding a Minecraft start-up script to SystemD will make it convenient to start your Minecraft server any time you need to put it up, such as after a system reboot. It also gives you an easy way to stop or restart the server.
Start by creating the following file with nano or your preferred text editor:
sudo nano /etc/systemd/system/[email protected]
Paste the following content in the new file:
[Unit]
Description=Minecraft Server: %i
After=network.target
[Service]
WorkingDirectory=/opt/minecraft/%i
User=minecraft
Group=minecraft
Restart=always
ExecStart=/usr/bin/java -Xmx4096M -Xms2048M -jar minecraft_server_1.16.5.jar nogui
[Install]
WantedBy=multi-user.target
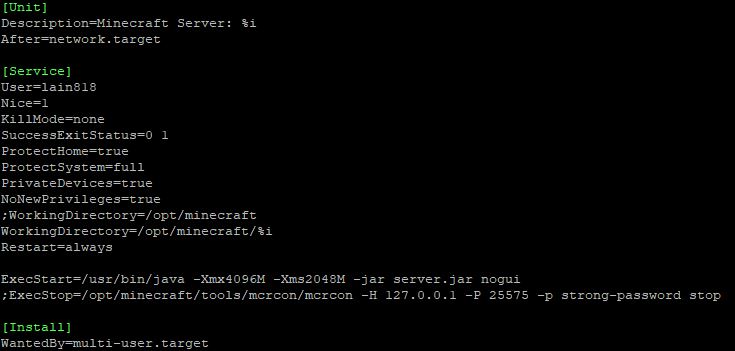
Note that line 12 instructs Minecraft on how much system memory it can use. The file above will allocate 4 GB of memory. If you’d like to allocate more – like 8 GB, for example – you would need to make the following change:
From:
ExecStart=/usr/bin/java -Xmx4096M -Xms2048M -jar minecraft_server_1.16.5.jar nogui
To:
ExecStart=/usr/bin/java -Xmx8192M -Xms4096M -jar minecraft_server_1.16.5.jar nogui
Before examining this command’s output, let’s take a closer look at all these command-line arguments, which are tuning your server:
Xms1024M:
This configures the server to start running with 1024MB or 1GB of RAM running. You can raise this limit if you want your server to start with more RAM. Both M for megabytes and G for gigabytes are supported options. For example: Xms2G will start the server with 2 gigabytes of RAM.
Xmx1024M:
This configures the server to use, at most, 1024M of RAM. You can raise this limit if you want your server to run at a larger size, allow for more players, or if you feel that your server is running slowly.
jar:
This flag specifies which server jar file to run.
nogui:
This tells the server not to launch a GUI since this is a server, and you don’t have a graphical user interface.
Let’s start your server with 2048M of RAM. Only now, let’s also grant Minecraft the ability to use up to 4G of RAM if it needs it. Remember, you are welcome to adjust this number to fit your server limitations or user needs.
For the first time we` ll be starting up the server manually from the regular Ubuntu account that we were using. This way, the server will make all files and folders needed for the server to work. It will take a bit of time, depending on your servers strength.
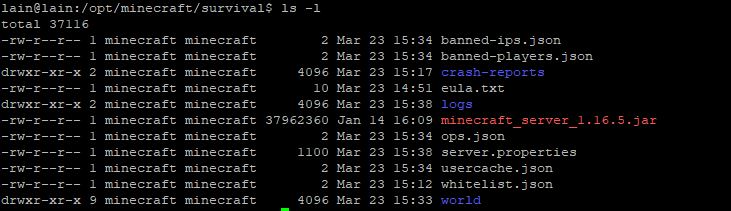
You can double-check that all the files and folders have the correct user/group assigned to it by navigating to the survival folder and typing:
ls -l
Starting the Minecraft server is very easy. Use the following systemctl command to put it up:
sudo systemctl start minecraft@survival
You can confirm the status of the server to make sure it’s up and running with the following command. It should return output that looks like the screenshot below.
sudo systemctl status minecraft@survival

Checking the status of the Minecraft server by typing the following command if you want the Minecraft server to automatically start every time your system reboots:
sudo systemctl enable minecraft@survival
You can also use bellow codes to stop or restart the server:
sudo systemctl stop minecraft@survival
sudo systemctl restart minecraft@survival
Step 4 – Setting up Minecraft`s properties
You can also edit the properties by using the bellow code:
sudo nano /opt/minecraft/survival/server.properties
File contents:
max-tick-time=60000
generator-settings=
allow-nether=true
force-gamemode=false
gamemode=0
enable-query=false
player-idle-timeout=0
difficulty=1
spawn-monsters=true
op-permission-level=4
pvp=true
snooper-enabled=true
level-type=DEFAULT
hardcore=false
enable-command-block=false
max-players=20
network-compression-threshold=256
resource-pack-sha1=
max-world-size=29999984
server-port=25565
server-ip=
spawn-npcs=true
allow-flight=false
level-name=world
view-distance=10
resource-pack=
spawn-animals=true
white-list=false
generate-structures=true
online-mode=true
max-build-height=256
level-seed=
prevent-proxy-connections=false
use-native-transport=true
motd=A Minecraft Server
enable-rcon=false
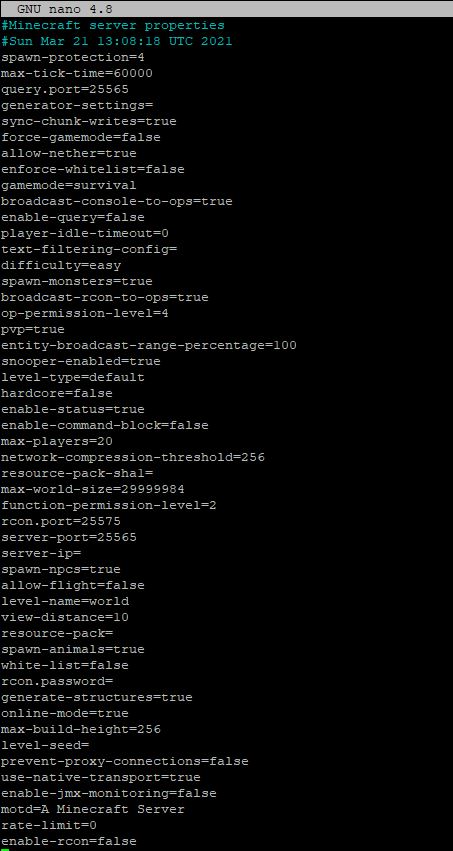
Let’s take a closer look at some of the most important properties in this list:
difficulty (default easy) – This sets the difficulty of the game, such as how much damage is dealt and how the elements affect your player. The options are peaceful, easy, normal, and hard.
gamemode (default survival) – This sets the gameplay mode. The options are survival, creative,adventure, and spectator.
level-name (default world) – This sets the name of your server that will appear in the client. Characters such as the apostrophe may need to be escaped with a backslash.
motd (default A Minecraft Server) – The message that is displayed in the server list of the Minecraft client.
pvp (default true) – Enables Player versus Player combat. If set to true, players will be able to engage in combat and damage each other.
Step 5 (Optional) – Make a new Minecraft server instance on the same host
If you want to host another instance of Minecraft, most of the work has already been done for us. Now, we just need to copy over some of our existing configuration for the new instance. Since the first server runs on port 25565, we will run the second Minecraft server on port 25566 in this example.
First, make a new directory for this instance. We’ll just call this new server creative:
sudo mkdir /opt/minecraft/creative
Now we need to add the new port we will be using to the firewall exceptions:
sudo ufw allow 25566
You can check if it worked by typing in the terminal:
sudo ufw status

Next, copy over the .jar file from the other Minecraft directory, and accept the terms and conditions again:
sudo cp /opt/minecraft/survival/minecraft_server_1.16.5.jar /opt/minecraft/creative/
sudo bash -c "echo eula=true > /opt/minecraft/creative/eula.txt"
Use the following command to append a line inside Minecraft’s configuration file. This will configure the server instance to run on port 25566:
sudo bash -c "echo server-port=25566 > /opt/minecraft/creative/server.properties"
Give your minecraft user ownership of the new directory:
sudo chown -R minecraft:minecraft /opt/minecraft/creative/
Now, use systemctl to enable the server to start at system boot and start the server:
sudo systemctl enable minecraft@creative
sudo systemctl start minecraft@creative
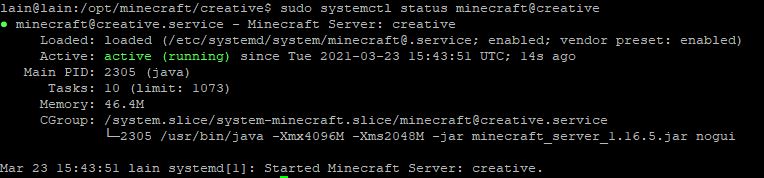
Verify that the new instance is running correctly:
sudo systemctl status minecraft@creative
Lastly, use the following content as a reference for the various settings you can use for your server(s). These settings are stored in the server.properties file inside /opt/minecraft/creative.
sudo nano /opt/minecraft/creative/server.properties
File contents:
max-tick-time=60000
generator-settings=
allow-nether=true
force-gamemode=false
gamemode=0
enable-query=false
player-idle-timeout=0
difficulty=1
spawn-monsters=true
op-permission-level=4
pvp=true
snooper-enabled=true
level-type=DEFAULT
hardcore=false
enable-command-block=false
max-players=20
network-compression-threshold=256
resource-pack-sha1=
max-world-size=29999984
server-port=25566
server-ip=
spawn-npcs=true
allow-flight=false
level-name=world
view-distance=10
resource-pack=
spawn-animals=true
white-list=false
generate-structures=true
online-mode=true
max-build-height=256
level-seed=
prevent-proxy-connections=false
use-native-transport=true
motd=A Minecraft Server
enable-rcon=false
Step 6 (Optional) – You can run your instance manually (you need to have a free port)
You can also run your server manually and type in Minecraft commands in the terminal:
java -Xmx4096M -Xms2048M -jar minecraft_server_1.16.5.jar nogui
Give the initialization a few moments. Soon your new Minecraft server will start producing an output like this:
Output
[21:08:14] [Server thread/INFO]: Starting Minecraft server version 1.16.4
[21:08:14] [Server thread/INFO]: Loading properties
[21:08:14] [Server thread/INFO]: Default game type: SURVIVAL
[21:08:14] [Server thread/INFO]: Generating keypair
[21:08:15] [Server thread/INFO]: Starting Minecraft server on *:25565
Once the server is up and running, you will see the following output:
Output
[21:15:37] [Server thread/INFO]: Done (30.762s)! For help, type “help”
Your server is now running, and you have been dropped into the server administrator control panel.
Now type help:
help
An output like this will appear:
Output
[21:15:37] [Server thread/INFO]: /advancement (grant|revoke)
[21:15:37] [Server thread/INFO]: /ban <targets> [<reason>]
[21:15:37] [Server thread/INFO]: /ban-ip <target> [<reason>]
[21:15:37] [Server thread/INFO]: /banlist [ips|players]
…
From this terminal you can execute administrator commands and control your Minecraft server.
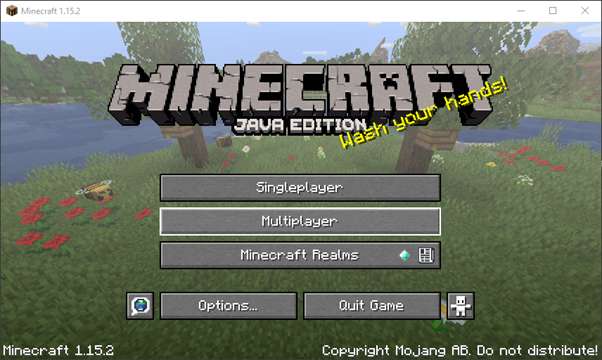
Step 7 – Setting up your Minecraft client to access the newly created server/servers
Launch your copy of Minecraft Java Edition and select Multiplayer in the menu.
Next, you will need to add a server to connect to, so click on the Add Server button.
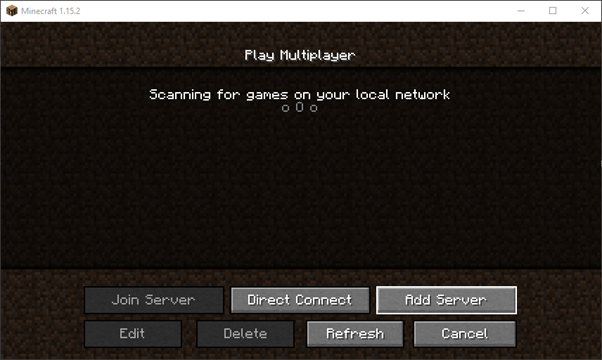
In the Edit Server Info screen that shows up, give your server a name and type in the IP address of your server. This is the same IP address that you used to connect through SSH if you connected locally or you can find your public IP (which your friends would need to connect) by typing “MY IP” in google.

Once you have entered your server name and IP address, you’ll be taken back to the Multiplayer screen where your server will now be listed.

From now on, your server will always appear in this list. Select it and click Join Server.
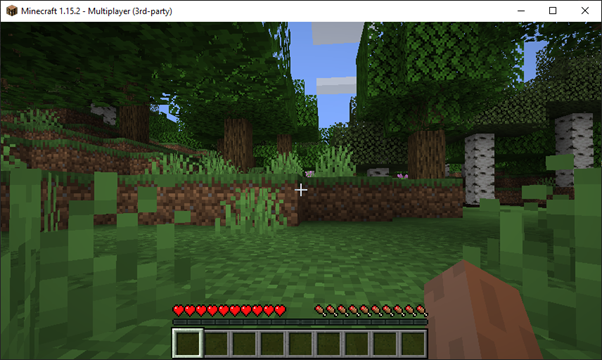
You are in your server and ready to play!
Step 8 (Optional, but recommended) – Automatically Backing Up Your Minecraft server in Ubuntu
There are numerous reasons why would you make a copy of the server.
- Some random player has destroyed your world and you need to roll it back.
- Some devastating fires took your village.
- You fell into a lava pit with your all your coolest stuff on and can’t bear the thought of having to do without.
- Some other stuff I couldn’t think off.
So what to do? Lets make an executable file with a cron job attached to it, so it runs daily and having 10 different days to restore from.
Before you start you need to check your folders for correct permission. You can set the permission for your Minecraft user (made previously):
sudo chown -R minecraft:minecraft /opt
In your terminal make a new file:
sudo nano /opt/minecraft/daily-backup
Inside the file paste the bellow code:
cd /opt
rm - f minecraft.tar.gz.11
mv minecraft-day10.tar.gz minecraft-day11.tar.gz
mv minecraft-day9.tar.gz minecraft-day10.tar.gz
mv minecraft-day8.tar.gz minecraft-day9.tar.gz
mv minecraft-day7.tar.gz minecraft-day8.tar.gz
mv minecraft-day6.tar.gz minecraft-day7.tar.gz
mv minecraft-day5.tar.gz minecraft-day6.tar.gz
mv minecraft-day4.tar.gz minecraft-day5.tar.gz
mv minecraft-day3.tar.gz minecraft-day4.tar.gz
mv minecraft-day2.tar.gz minecraft-day3.tar.gz
mv minecraft-day1.tar.gz minecraft-day2.tar.gz
mv minecraft-day0.tar.gz minecraft-day1.tar.gz

tar -cpvzf /opt/minecraft-day0.tar.gz /opt/minecraft
Save the file and make it executable.
sudo chmod +x /opt/minecraft/daily-backup
Now we can set the daily backup with cron:
cron -e
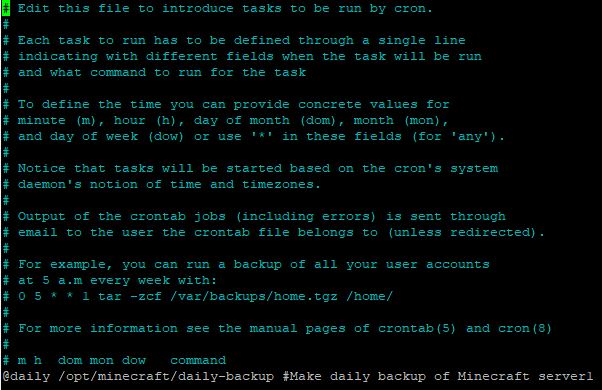
Add:
@daily /opt/minecraft/daily-backup #Make daily backup of Minecraft server1
Step 9 – (Hopefully you will never need this step) – Restoring your server
A backup isn’t much use without a way to restore it. But remember that the tar command we ran just copied the whole directory, so while there’s probably files that you don’t need:
Stop the Minecraft server you’re about to restore.
sudo systemctl stop minecraft@survival
Rename the directory from from /opt/minecraft to /opt/minecraft1
sudo mv /opt/minecraft /opt/minecraft1
Find the backup tar file that you’re going to use to restore your server.
sudo tar -xvf minecraft-day1.tar.gz
Start the server.
sudo systemctl start minecraft@survival
Hopefully that worked for you.
Step 10 – Port forwarding on your modem or router
This step is different for each modem or router brand. Basically you need to find the “Port forwarding” option and forward the traffic to your Minecraft server.
The bellow image is showing how the port forwarding interface looks in our modem, but yours will be different.
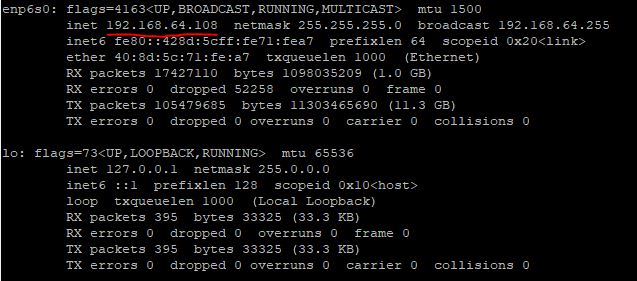
You need to input the port – 25565 & 25566 (if you want to set up a 2nd instance), and your local IP address on which the Minecraft server runs.
You can check the IP by typing in the terminal:
ifconfig
If you don’t have net-tools installed you can do so with the code:
sudo apt install net-tools
- Example of how the port forwarding option looks on our modem

After saving the port forward address your Minecraft server should be accessible from your public IP address.
Conclusion
In this guide, we saw how to run a Minecraft server on Ubuntu 20 Focal Fossa. For instance we also learned how to configure multiple instances of Minecraft server to run on a single host as well as how to make automatic daily backups.
By following the steps in our tutorial, you can have a Minecraft server up and running in just a few minutes, above all with a convenient script configured to make controlling the status of your server as easy as it gets.
Have fun exploring, crafting, and surviving in a crude 3D world.
Some errors we encountered and can help you:
In addition when a non-op player tries to break blocks in the spawn protection of a server, the following warning is logged:
[23:55:13 WARN]: Mismatch in destroy block pos: fk{x=-9, y=0, z=-6} fk{x=1, y=2, z=1}
How to fix:
Disable the spawn chunk protection in server.properties can fix this !
Make a player OP by finding his name and UUID after he/she connects to the Minecraft server:
sudo systemctl status minecraft@surival

After that you need to open the ops.json file located in your installation folder:
sudo nano /opt/minecraft/survival/ops.json
  {
    "uuid": "bb729935-500d-4c64-995b-6b580c9edd32",
    "name": "Somebodys name",
    "level": 4,
    "bypassesPlayerLimit": false
  },
  {
    "uuid": "2b9f6d7f-75a4-4695-9c4a-2acfec7737d5",
    "name": "OtherPlayer",
    "level": 4,
    "bypassesPlayerLimit": false
  }
]
Save the file and restart the server. Now the players which you registered should be OP in game.
Now you have 2 working Minecraft Java Edition servers.
You can find more of Ubuntu tutorials on the link: https://wtp-web.com/blog/
If you have any suggestions on how to improve this article we are always happy to receive your feedback on our e-mail [email protected]. Thank you for reading and happy computing!
Maurice
Please change: the following line in your SystemD startup script
WorkingDirectory=/opt/minecraft/survival/%i
to
WorkingDirectory=/opt/minecraft/%i
Miran
I fixed it, thanks for noticing it