Enabling the network on a Windows machine within your home should be a piece of cake at this point in time. I would think that configuring a home network cant be really hard and should not be a problem. It should not be, but sometimes it is. In this guide you can find the standard way of configuring your home network within Windows 10 and some pointers that aren`t as standard.
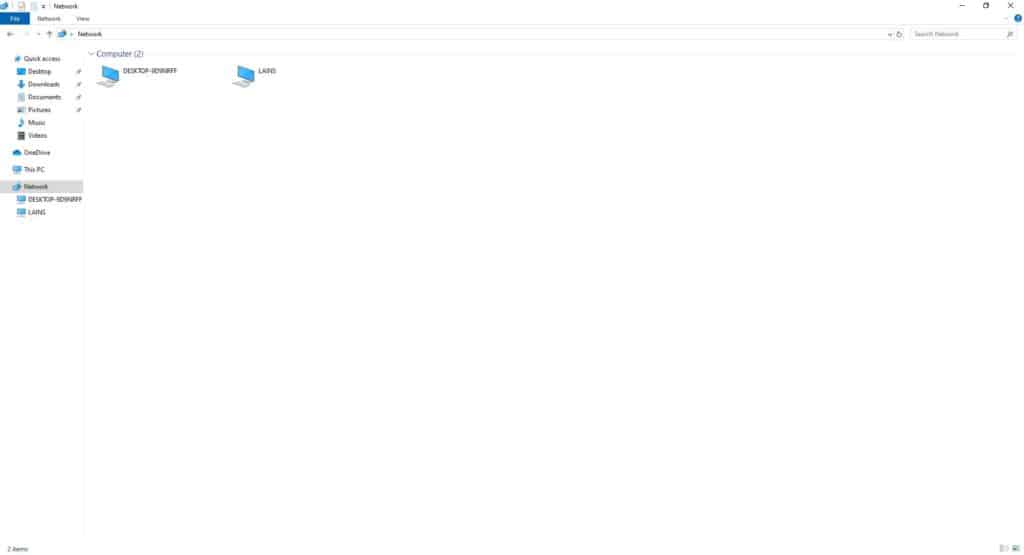
Basically what we want is for other computers to show up in the “Network” section of the file manager like in bellow image.
Enabling the network in your home with network discovery:
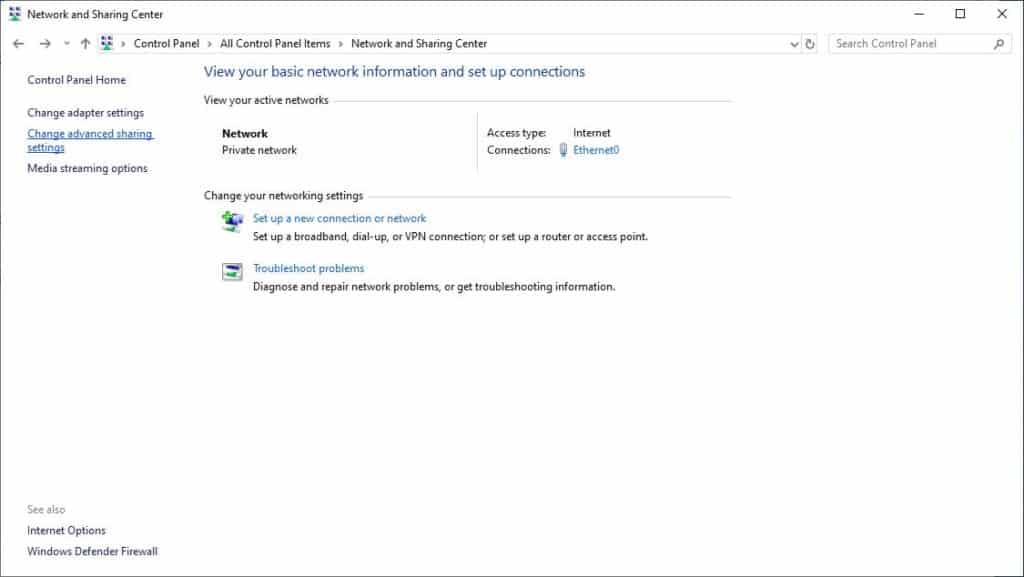
You can do this via Control panel –> Network and Sharing Center –> Advanced sharing settings.
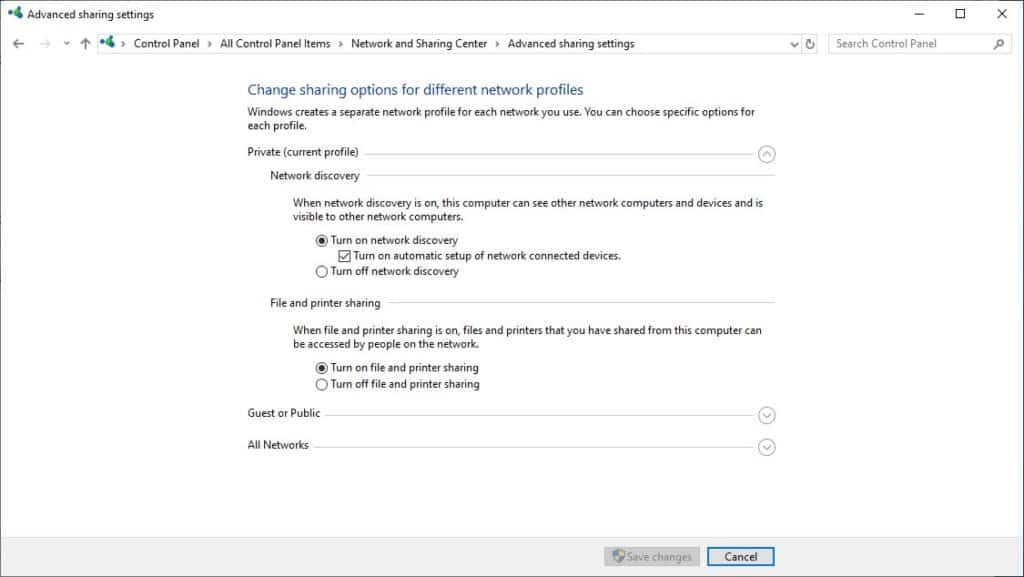
You need to thick “Turn on automatic setup of network-connected devices” and “Turn on file and printer sharing”.
Or you can go to File Explorer and start the same procedure on the top of the explorer.
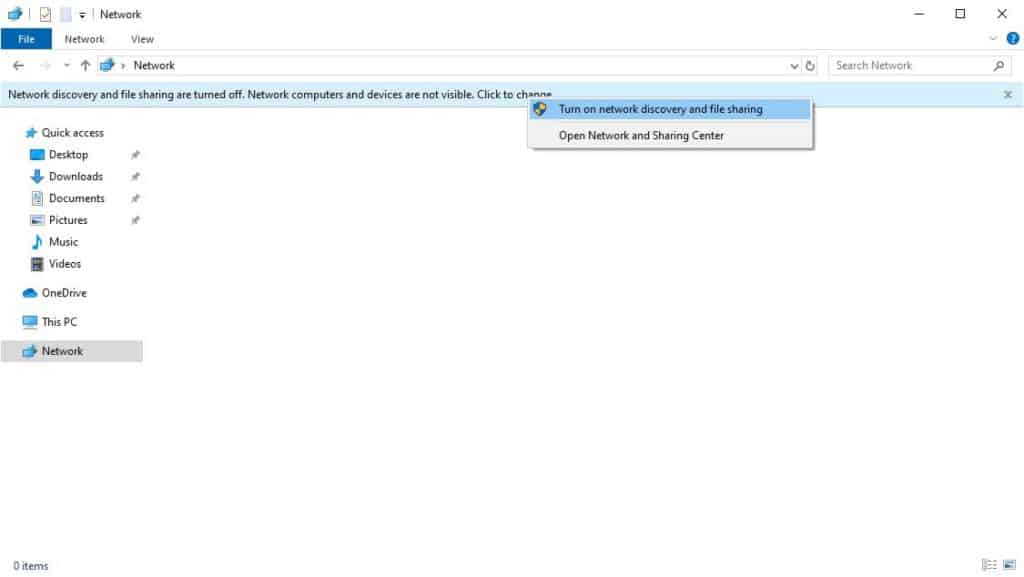
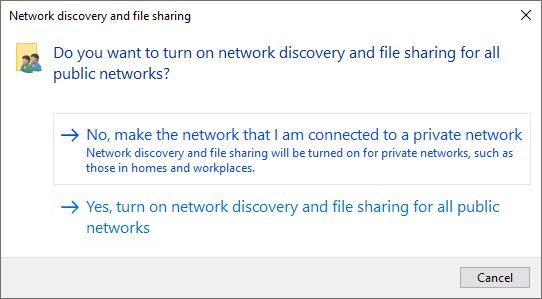
If its a home network you are working on, choose the 1st option (No, make the network…).
Services.msc:
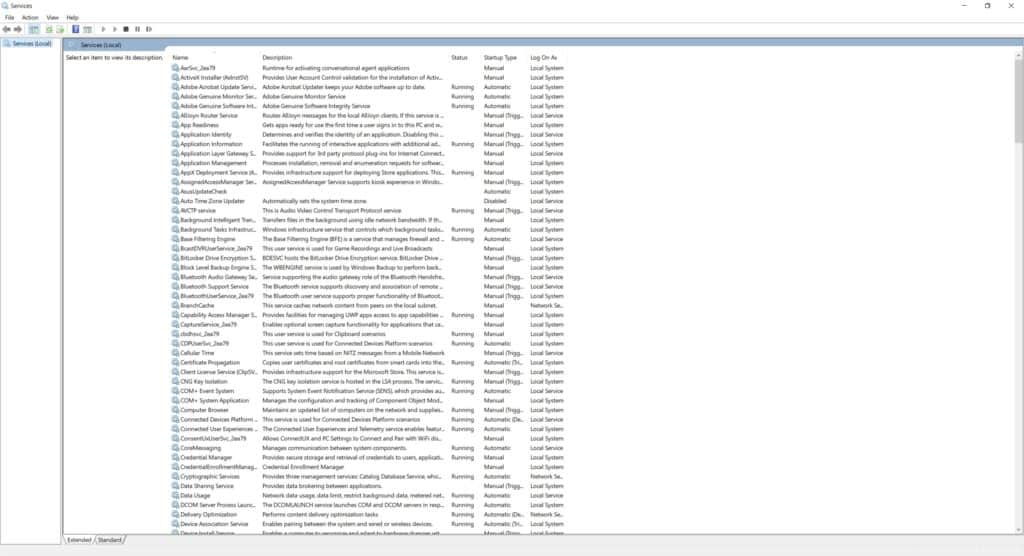
Type “Services” in the search bar or run Win+R and type “services.msc” in there.
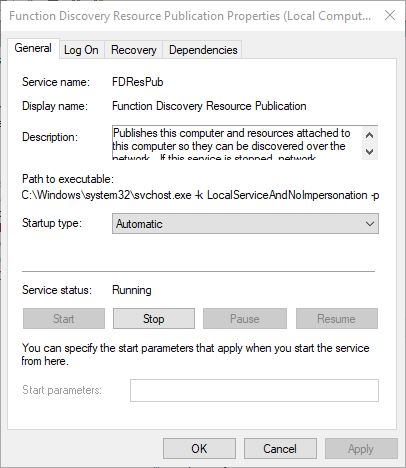
Enabling certain Services in Windows 10 and set them to start Automatic (Delayed start) or Automatic under properties.
So, in the services.msc menu find and “start” each of the bellow listed services that are not already started (bellow the image).
- Function Discovery Provider Host (FDPHost)
- Function Discovery Resource Publication (FDResPub)
- Peer Name Resolution Protocol (PNRPSvc)
- Peer Networking Grouping (P2PSvc)
- UPnP Device Host (UPnPHost)
OptinalFeatures.exe
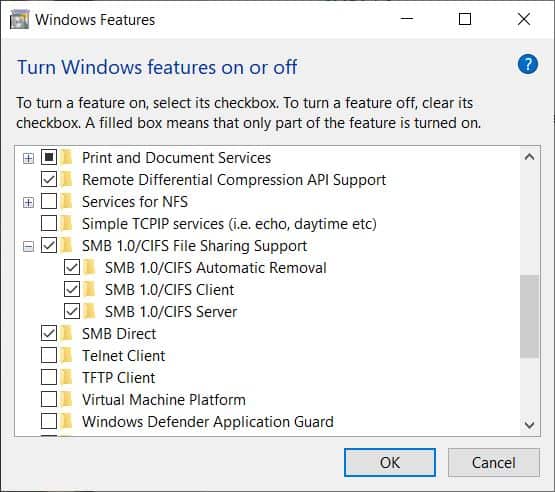
Windows 10 v1803 removed Computer Browser service as Server Message Block 1.0
feature is disabled by default in v1803. Computer Browser needs SMB 1.0 to work, but Microsoft suggests keeping SMB 1.0 disabled for security reasons, because of the ransomware attacks (like WannaCry) exploiting SMB 1.0. You can read more about this on the Microsoft blog post Stop using SMB1 | Storage.
SMB 1.0 can be turned on with the “OptinalFeatures.exe”, but at your own risk.
Sharing folders and disks on your local network:
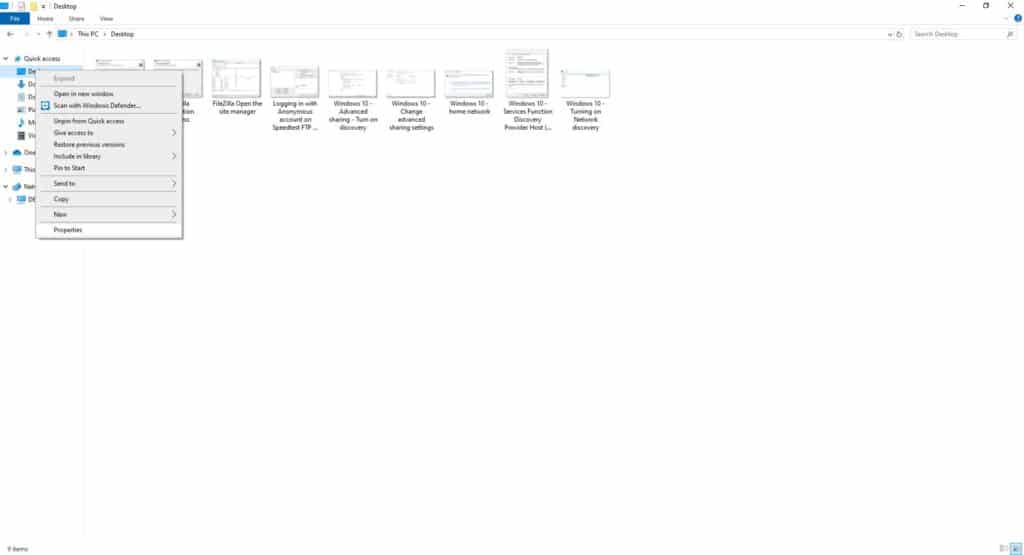
Open File Explorer in Windows 10 and right click the folder/disk you want to share on your home network. Select properties.
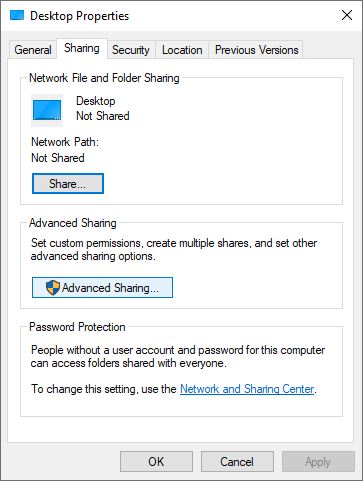
Select the tab “Sharing” and then “Advanced Sharing” option.
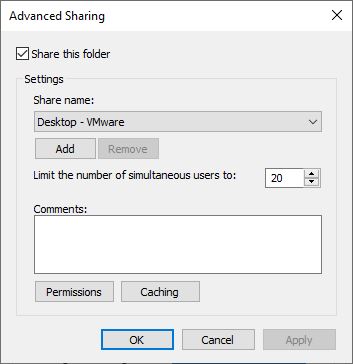
Tick the “Share this folder” box and name the folder (this is how it will be seen on the network).
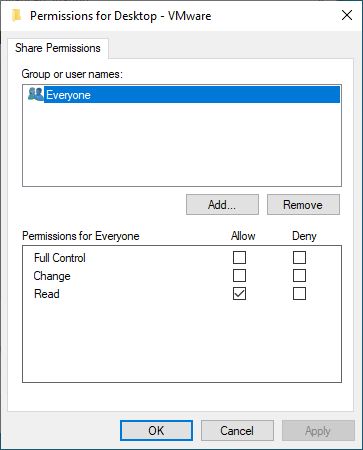
You can also add permissions – choose the option “Permissions” and there you can check the boxes what do you want your users to be able to do – read, write, both…
In conclusion, our network should be working now.
You can find more tutorials on the link: https://wtp-web.com/blog/
If you have any suggestions on how to improve this article we are always happy to receive your feedback. Send us an e-mail feedback@wtp-web.com. Thank you for reading and happy computing!
